A Surface Designer's Toolkit: Exploring Traditional Media
When it comes to the hot topics in the world of Surface Design one of the questions I hear the most is which program should I use? While choosing between Illustrator, Photoshop, Procreate, or an array of other digital platforms, or trying to learn them all can seem like an important decision in your creative career, programs are merely just more advanced tools to assist in executing your creative vision. I want to stress that learning how to use one tool over another doesn’t replace learning the foundations of an art & design education. So the continuous debate over which program reigns supreme will have to be a topic for another day because in this blog I’m going to strip it all back to the basics - working with traditional media.
As a RISD alum, I can attest firsthand to the importance of having a foundation in exploring traditional mediums before adding these digital tools into the mix. Before you even consider what programs to use to refine your work for passing off production-ready files to clients, you need to figure out if you prefer drawing, painting, being more experimental, or if you like to fuse a variety of things together for your personal creative handwriting. Long story short? Programs shouldn't be the primary focus when it comes to developing your skills.
Whether you are just getting started or looking for something new to add to your tool kit, the discovery phase of working with traditional media can help you define your signature process and better guide you to what digital tools will ultimately align with your art-making practice and style – when that time comes. That’s why in this blog post, I’m focusing on the importance of using traditional media as the foundation for developing your own distinctive creative approach. For now, let's dive into the world of traditional media together (Remember I'm here for any questions you have along your creative journey).
Without further ado, let’s dive in!
Pro Tip: In Surface Design, whole natural-looking motifs are extremely important.
Avoid cutting off or jamming your motifs to the edge of the page. Instead, pick a slightly larger paper or other ground choice to allow you to give everything enough breathing room during the development process. Try working with a 1-2 inch gutter from the sides of your paper to provide ample room for your elements so that they will flow better when it comes to placing them in compositions & pattern layouts.

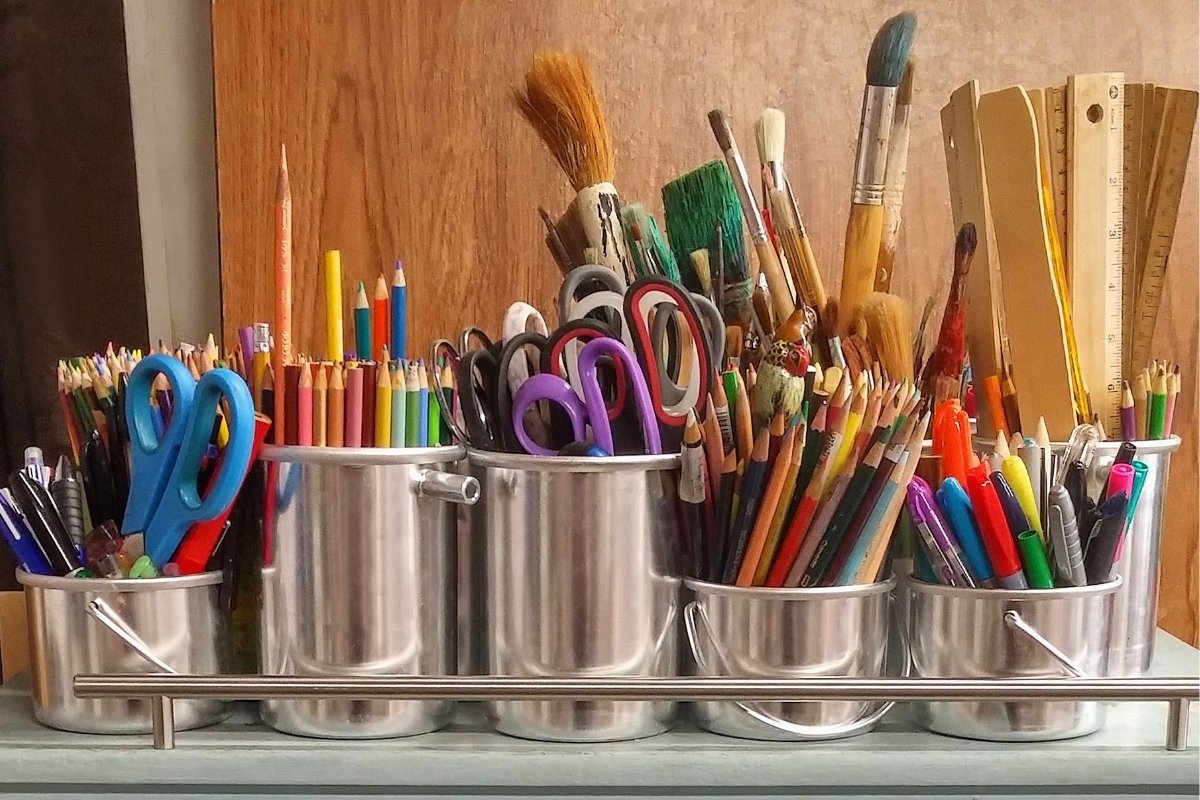
Drawing skills can greatly help you on your creative career path to be able to sketch out and communicate your ideas with others. By defining motifs with line work and shading techniques, drawing tools usually offer a bit more control than with painting or experimental techniques. So, regardless if your style encompasses looser gesture drawings or more detailed realistic renderings, or if you prefer working in black and white or color, there is an array of easily accessible tools that will suffice. Read: you don't need expensive supplies just to get started! Standard No. 2 pencils, ballpoint pens, kids' crayons & markers are all perfectly fine for getting started(and to carry through your career).
Whether you prefer individual sheets, boards, pads, or rolls… there are also a multitude of different kinds of papers to explore. My personal favorites? I prefer sketching on tracing paper or transparent vellum. These options are great for refining and drawing variations of motifs and playing with layouts. What I like most about these surfaces is that they make the sketches feel less precious or finished which in turn allows me to feel more detached from the piece and continue to work back into it and refine it. I can tear pieces off or cut the motifs apart and experiment with the composition easily. For more finished pieces, I prefer paper that is around 140 lb/300 gsm or thicker so that I can layer different kinds of media. I know plenty of professional artists who just work on standard printer paper, so no pressure to invest in supplies that might be outside of your budget.
Graphite, Conte, China Marker (sticks and pencils)
I often work with mechanical pencils to have a consistent thin line and not have to sharpen my pencil all the time when I’m in the early development phase of a project, but when I want to embrace line weight variation or incorporate different shading techniques, I use a variety of pencils from 6 H to 8 B (hard to soft). Conte and china markers are also fun to use on toned or darker paper for interesting layering effects.
Charcoal, Chalk & Pastels
While charcoal, chalk, & pastels are not some of the more traditional media for surface design due to the softer edges and blended colors they create, they are still worth investigating. With digital printing being more widely used in the industry, a wider range of media can be used to create a vast array of effects and provide you with even more opportunities to stand out in your own unique way.
Markers, Pen & Ink
From fineliner pens to markers to fancy calligraphy nib pens… these utensils all provide for a wide array of drawing styles. Pen and ink often require a slow steady hand, while markers allow for a range of drawing styles from loose to refined, from full coverage to linear or dotted shading techniques.
Colored pencils & Caran d’ache
Take a walk down memory lane and reacquaint yourself with the wonder that crayons and colored pencils brought to your childhood. For a little bit of a twist on these tools try the water-soluble kind (which has been a personal favorite since college)! I particularly like mixing drawing strokes with the ability to work back in with water for some painterly effects.
Brush Pens
Brush pens are a staple in my creative toolkit, especially for their versatility in calligraphy and lettering. The way the stroke width changes with pressure fascinates me, offering a beautiful dynamic range in my work. When I'm aiming for a softer, watercolor effect, I turn to my trusted Refillable Water Brush Set, blending colors seamlessly into my sketches for that perfect artistic expression.
Scratchboard
Coated scratchboards provide a different kind of surface that can yield interesting results with an inverse drawing technique, where you remove the dark coating to reveal the lighter strokes of the hidden ground.

Again, I want to stress that you don’t have to invest in the most expensive paints or brushes to get a feel for if you are more of a painter than an illustrator. Seriously, try out kid’s Crayola watercolors or tempera paints when you’re just getting started. The main goal is to figure out which techniques and styles most naturally come out of you. For example, do you prefer a loose expressive, naive approach, or a tight, refined one? Do you prefer a more illustrative representational style or a fine art intuitive technique? What kinds of colors do you naturally gravitate to working with or combining? Do you prefer to work with colors as is or mix them to create custom colors? Do you like bright palettes or are muddier more neutralized tones your jam?
Just like drawing, painting offers a wide range of options to explore and even more possibilities for ground surfaces to work on. From canvases to wood panels to watercolor blocks and beyond there are so many opportunities to discover what you like working with most. Watercolor or pastel ground mediums are fun to try if you want to work with a wider range of media on canvas.
Gouache & Watercolor
Before digital programs were even an option, Gouache was the traditional go-to painting media for Surface design to get flat colors for creating screen separations for printing production. As technology has evolved more fluid and textured painting techniques have become more prevalent in the market. With the option to dilute both watercolor and gouache for a more transparent effect, work with a bit heavier coverage, or layer with a variety of drawing tools, these paints offer so much potential to build out a truly personalized method for creating. Because of their water-soluble nature, you can often work back into both gouache and watercolor to lift the paint with water to reveal highlights, but another fun thing to try is using masking fluid to block out the areas of your paper that you want to remain light before you start painting. For speeding up the drying time when working with a higher water-to-paint ratio try working with a hair dryer or I often end up working on several pieces at once jumping between projects and allowing time for different layers to dry.
Acrylic & Oils
As more traditional fine art media, Acrylics and Oils can be wonderful choices if you want to pursue selling original fine art pieces in addition to using your artwork on products for Surface Design. Acrylic dries much faster than oils but both can be used with different mediums that affect drying time (to slow down or speed up the drying time respectively). Experimenting with incorporating different modeling paste and working with palette knives over brushes can also aid in diversifying your work in the market. Both acrylic and oils can be mixed with different diluting methods or layered in thick strokes to achieve a wide range of effects and both options are water resistant when dry.

As an avid art supply collector, I’m a huge advocate for stepping out of your creative comfort zone monthly and dedicating time to artistic exploration. It's exhilarating to delve into unfamiliar territory. While all media can be used in nontraditional ways and pushed to achieve a myriad of experimental results, a majority of the techniques focused on in this section use creative processes where there is often the least control at the hands of the creator and can sometimes yield more unexpected results. If you're unsure where to begin, I hope some of my personal favorites and techniques will be helpful.
Assemblage: Collage, Mixed Media, & Embellishment
Carefully cut or torn pieces of colored paper or painted washes are excellent starting points for assembling collage and mixed media pieces. You can create representational collaged motifs or work more abstractly. Have fun playing with combining separate elements and moving them around your page before committing to your layout. Incorporating other found items like pressed flowers or textured surfaces can add another layer of personalization and dimension to this technique. Don’t be afraid to think out of the box or beyond 2D materials. If you like sewing or knitting give embroidery, embellishment, and creating appliques techniques a try for a different kind of collage work. There are a wide variety of ways to use these techniques throughout the surface design world from apparel to craft projects.
Printmaking: Monoprints, Block printing, Collagraphy
Ever since taking a continuing education printmaking class at Art Center several years ago, I’ve been collecting various tools for trying more techniques at home. Gelli plates, Brayers, and Barens have been essential for a wide range of printmaking techniques from repeatable Block printing to one-of-a-kind Monoprints. Collagraphy, a printmaking technique that beautifully marries the tactile depth of collage with the expressive capability of print, has become a fascinating exploration in my studio. Utilizing various sturdy boards and panels as bases, I've been experimenting with layering various textures and materials to create unique printing plates. This method allows for an intriguing play of depth and detail, offering a new avenue for my creative expression.
Fluid Art: Marbling, Paint Pouring, Alcohol Ink
My experiments with fluid art have been major exercises in releasing control, embracing the process, and being open to the imperfect perfection of the unexpected. Alcohol ink has become one of my favorite mediums for its vibrant, abstract appeal, perfect for unleashing creativity. However, it's crucial to work in a well-ventilated area and use a respirator for safety. Paint Pouring & Marbling have also caught my attention for their unique beauty of intricate, swirling patterns that are as unpredictable as they are beautiful.
Resist Dyeing: Shibori & Batik
Shibori is a resist tie-dyeing process that creates beautifully uneven patterns on fabric through folding, twisting, binding, clamping, and stitching techniques. Although fiber-reactive indigo dyes are the traditional choice, there are a wide variety of other options that work with natural or synthetic fabrics. If you are interested in exploring Shibori further, I recommend checking out Make it in Design’s The Gift of Creativity FREE Class for my instructions on the Itajime Shibori Technique. Batik is a wax-resist technique where patterns are drawn or stamped on cloth with specialized tools. The fabric is then soaked in a single dye color, after which the wax is removed through a boiling process and the whole process can be repeated to achieve a multi-color design.
Photographic Processes: Photography & Cyanotypes
Since early in my career, I have used my photography to add textures and experimental effects to my surface design work. Recently, I’ve become incredibly intrigued by one of the oldest cameraless photographic printing processes, Cyanotypes. Prints in a distinctive shade of Prussian blue are revealed after exposure to ultraviolet light and set by washing the exposed paper in water. Try arranging found objects or botanicals, layering materials with varying opacity, printing photos or drawing & painting on acetate, as well as, wet techniques.
As I wrap up this portion of “Rebecca’s Favorites,” I’m reinspired to continue pushing creative boundaries. I can’t stress enough how traditional media plays such a pivotal role in this process, especially for those of us who crave more hands-on art-making. From the tactile feel of pastels to the unpredictable beauty of Shibori, each medium offers a unique way to express and explore. I encourage you to pick up something new, be it a Gelli plate or a set of alcohol inks, and see where it takes you. Let's continue to support each other in these creative explorations, and just embrace the process to see what evolves. For more insights, tutorials, and personal experiences with the media listed above, check out some of my behind the scenes activities on Instagram. Together, let's make art that resonates, challenges, and fulfills.
Art doesn't need to be a direct representation or copy of reality; it’s about interpreting the world the way you want to see it and expressing your unique viewpoint. For more tools and resources, be sure to join my email list!